When to Replace Your Brakes: A Guide for Beginners
What Are Brake Pads and Why Are They Important?
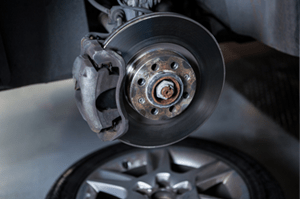
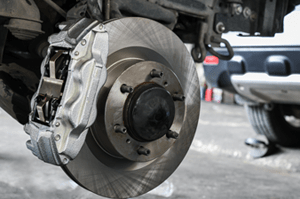
Brake pads are a section of the car’s braking system that take the impact of resistance necessary to stop the vehicle. Different types of brakes exist including the disc brakes, anti-lock brakes, drum brakes and emergency brakes. In a disc brake system, the brake pedal activates a hydraulic line which squeezes the calipers against the rotors of the car’s tires. These pads are located between the calipers and the rotors which absorb the energy and heat, which provide grip to stop the car instantly.
Every vehicle must be fully equipped with a proper braking system because this will depend on the safety of the vehicle, the people inside the vehicle, and everything around the vehicle. It is one of the most critical safety features and there’s no doubt that you cannot do without it.
When using a marketplace like Carpages.ca, make sure to consider the condition of the braking system when buying a used car. One way to do this is by listening for unusual sounds when doing a test drive. You can also do a visual check of the brake pads to see their overall condition.
Now that you know the different types of brakes and why they are essential, let’s move on to our topic. How to know when to replace your brakes: a guide for beginners.
Changing your brakes has no specific schedule however, a new noise or a change in the way the car feels on the road are good indicators that it might be time. Whether you know how to check them yourself, or are getting professional help from a mechanic, it is always a good idea to check once you start having suspicions. Fortunately, brake pads help determine when our brakes need changing because they’re designed to show clear signs that they need to be replaced.
6 Signs That You Might Need to Change Your Brakes
1) Steering Wheel Vibration – A vibrating steering wheel can mean that your tires might need to be rotated or they need air. It can also indicate that there is a problem with your braking system. If your steering wheel vibrates or feels unstable when you apply pressure to the brakes, you should inspect the brake pads of your vehicle.
2) Squeaking Sounds When Braking – When you apply the brakes on your car while it’s moving and you hear a high-pitched noise that sounds like metal grinding, it may be that the brake pads have worn out and it is time to change them.
3) Thin Brake Pads – If you carry out a general inspection of your vehicle with your mechanic and they check the thickness of the brake pads and it is less than a quarter inch, you need to change your brakes.
4) Grinding/Noisy Brakes – When you apply pressure to your brakes, and you hear a grinding noise this simply means you need a new pair of brake pads. When you hear this noise, it means that the metal disc and the metal caliper are rubbing against each other creating a metal-on-metal grinding sound. This means the brakes have been completely worn down and it’s time to replace them.
5) Leaking Brake Fluid – A burning smell while driving could mean brake fluid is leaking onto the hot motor. Brake fluid is essential for a braking system to operate properly and therefore can cause the brakes to stop working if it has run out.
6) Warning Light – Older cars may not have this feature, but many cars have electronic indicators that alert the driver with a dashboard warning light if the pads wear down to a specific measurement. Though this might mean brake fluid is low, it is best to rely on regular brake inspections.
How Often Do You Need to Change Your Brakes?
Generally, brake pads need to be replaced between 40,000 to 70,000 miles. The timeline depends on how the brakes are used and will determine how long they last. It is suggested that you check your brakes when you have your tires rotated about every 6 months. Ask your mechanic to inspect the thickness of the brake pads and the condition of the calipers and rotors. The best way to determine the amount of life left in your brakes is through a visual check!
We at DT Auto Parts recommend taking a look at the CARQUEST catalog to help mechanics and folks at home figure out the kind of brake pads they need for each vehicle. Make sure to reference these parts since the wrong set will affect the quality of their performance.
I recently purchased a used car – and it is a stick shift. At a time when cars are driving themselves there is something enjoyable about having to do some work. If you are like many people you may think that a manual car is like an old chariot from the era of the “Ten Commandments” movie. Perhaps many people do think of manually cars this way since most drive automatic cars these days. If you have only driven an automatic car, then you have missed out on a subtle known art form.
It Is Not Easy To Drive Manually
It will not be easy at first, but a whole world of exciting opportunities will open up to you if you do. Most of your buddies, if they are the average types, will only know how to drive automatics. You will standout if you know how to drive a manual. You may even be escalated to higher car rank status if you are the only one in your group who knows how to drive stick shift. Ok that might be pushing it.
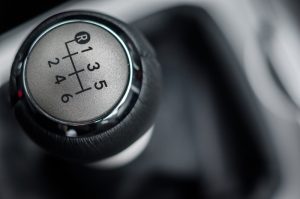
There is a bit of an art to driving stick shift. If you put the keys into the ignition, you might be able to start the engine. But that’s the only thing that the car will do – run the engine but not the whole car. The engine will keep idoling unless you put it in gear, or stall if you take your foot off the clutch.
And that is the art of driving stick shift – knowing how and when to push the right buttons – so to speak. It goes to say that driving a car with manual transmission takes more time to learn than a car with an automatic transmission. But manual is far more exciting.
A Lot More Exciting Than Automatics
A car with manual shift is a lot more exciting to drive than a car with automatic shift. Ever wonder why those cars racing in Lemans, FI racing, NASCAR and many other car racing circuits are equipped with sticks and not automatic shift? The reason is very simple they are more intuitive allow for greater control and adaptation to driving conditions.
There is no way you can develop driving skills in an automatic car because the car’s automatic shift system does the thinking for you. How can you expect to develop any art or skill in driving if you let the machine do it for you?
Why Driving Became A Lost Art
Oldsmobile introduced the automatic transmission in the 1940s and we lovingly embraced this new technological development, not knowing that this automatic shift will spell the doom of an important skill. And now, driving has already become a lost art making the need to re-learn the art a necessity at this time.
Why Do You Need To Drive A Stick Shift Car?
There are many reasons why manually driving a car is better than driving a car with automatic transmission. The only real good reason for driving an automatic is for convenience. But the downsides to that are many, increased fuel consumption, and high initial cost. Some advantages to driving a manual care include:
Greater fuel economy
Greater control of the car
Lower initial cost
Lower maintenance cost, and
The perfection of the lost art of driving
How do you drive a stick shift?
A famous race driver once said: you need to step on the brakes as if it is a thin-shelled egg that will instantly break if you do it carelessly – not really his words but words to that effect. That could sum up the idea about the art of driving.
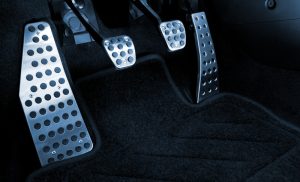
There are essentially four parts of a manually driven car that will make it move: the engine, the clutch, the brake pedal, the gas pedal and the stick. The car’s engine is its power source while the clutch is what you will step on or step off each time you shift gears. It is obvious what the gas pedal does but you will need to coordinate it with the clutch.
That means your left foot must be on the clutch while your right foot is on the gas pedal. And you need to coordinate your use of the stick with the gas, the brake and the clutch pedals if you are to move the car smoothly through the gears.
So, all of these steps have to be coordinated with each other if you are driving a car with manual transmission. Ever wonder why this is now considered a lost art with most people wanting to drive automatic cars? With an automatic, your mind is in limbo, while with sticks; your mind is forced to be active – even if you are already a pro-driver. Just ask the professional racers.
If you really want to develop the art of driving skill shift, please visit this webpage. It will show you the basics of driving a manual transmission car. You will need a lot of practice before you can consider yourself someone who practices the art of skillful stick shift driving.
Happy Driving!
10 tips to Car Detailing and Cleaning
10 tips to Car Detailing and Cleaning
When it comes to auto detailing, you can spend a couple hundred dollars to have someone do your car detailing for you, or you can take a few hours and DIY. Auto detailing can be a time consuming and laborious process, but it can also bring you a great deal of satisfaction as well. Professional auto detailers have years of experience and have built up an arsenal of car detailing tips and tricks to get into even the tiniest nooks, crannies and crevices. Thanks to the internet, however, many of the best car detailing tips are available to even the least experienced. Here are 10 great car detailing tricks and tips to help you deal with even the trickiest nooks, crannies, crevices and surfaces in your car.
1. Use a nylon over the end of a hand vac to vacuum first, then vacuum again
Sometimes valuable items end up slipping down into cracks and crevices in your car that you may not even realize they are there. Before vacuuming, slip a piece of nylon over the end of the suction tube. Then you will be able to examine large items before they become unrecognizable in the pile of dust inside the vacuum. Once you have ascertained that you have not lost anything of value in your car, you can take the piece of nylon off the end of the hose and continue giving your car a thorough vacuuming.
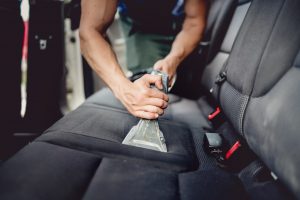
2. Use a rug shampooer to clean carpets and cloth upholstery
The same shampooer that can get deep stains out of your interior carpets and rugs also works great on your car. If you have cloth seats, you can also use it to deep clean upholstery to give it a clean factory-fresh finish.
3. Mark your microfiber towels in advance for what you will use them for
Microfiber towels are one of the very best materials for cleaning because they absorb dirt and dust rather than just sending it flying off into the air to land elsewhere. On the other hand, what it picks up, it doesn’t always want to let go of so easily. A number of auto cleaners can leave a waxy residue that will reside in your microfiber towels indefinitely. If you use those towels for cleaning windows, it can leave streaks behind that can be difficult to get rid of. Mark your towels in advance for what you will use them for and you can avoid having this problem.
4. Assemble a variety of tools in advance
There are a number of different small tools you will need to for interior car detailing. You can save yourself a lot of time by assembling a car detailing kit in advance and having it all laid out and ready to go. Here are some great implements for detailing small nooks, crannies and crevices.
Toothbrush
Foam paintbrush
Watercolor brush or small bristle brush
Flathead screwdriver wrapped in microfiber cloth
Q-tips
Can of compressed air
5. Remove scuff marks and stains on dash or plastic paneling with magic eraser
If you have stubborn stains or scuff marks on dashboards or plastic paneling, a commercially available magic eraser should do the trick. If that still doesn’t cut it, you can use a bit of isopropyl alcohol or a heavy-duty cleaner. Any time you use a heavy duty cleaner, however, you want to also follow up with a product that will provide UV protection.
6. Buff plastic and vinyl to a high gloss shine with olive oil
Pour a bit of olive oil on a microfiber towel and run over all plastic and vinyl interiors. The microfibers will keep the oil from pooling anywhere or making your interiors greasy, but will give it a natural, high-gloss shine without any harsh chemicals. Best of all, it will give your interiors a delicious, natural scent as well.
7. Use the two-bucket method to clean exterior
Fill one 10-gallon bucket with soapy water and another with clear water. As you are washing, before dipping your sponge or chamois in the soapy water, rinse if off in the clear water. This way, you will not simply deposit all the dirt you are cleaning off your car right back onto your car with the soapy water. You may need to clean out your clear water bucket a few times, but you will end up with a much cleaner car.
8. Windows
When cleaning windows, wipe horizontally on the outside and vertically on the inside. Then if you have any streaks left behind, you will know whether they are on the inside or outside. You can use a commercial cleaner or plain vinegar works just as well. You can also use newspapers instead of a cloth for cleaning windows. When you are done cleaning windows, finish off with a coat of Rain-X to keep your windows clean and increase visibility in inclement weather.
9. Start with least aggressive cleaners and work your way up
The more aggressive a cleaner is, the harsher the chemicals it usually contains. While you may need a strong cleaner for really tough, stubborn stains, you don’t want to use the strongest cleaners available for basic dirt, dust and grime or it will quickly eat through surfaces and finishes. Start cleaning with just basic soap and water or mild cleansers. Then, if you have really tough stains or problems, use your stronger cleaners just on those tough, stubborn stains.
10. Don’t forget the engine
Auto detailing doesn’t just mean cleaning the exterior and interior of your car. Your engine could use a thorough deep cleaning as well. Give your battery terminals a thorough cleaning, as well as the hooks and latches that hold your hood shut. For a really thorough auto detailing, you can give your entire engine a thorough cleaning. Be careful when cleaning your engine, however, to thoroughly water proof it. While your engine compartment should be relatively water safe, there are certain exposed hoses that should be covered just to be safe rather than sorry.
What the heck is an Oxygen Sensor?
What the heck is an Oxygen Sensor?
What does it mean when the check engine light comes on in your car, truck, minivan, or SUV? One of the most common causes of the check or service engine light and a corresponding heater circuit malfunction code is a faulty or failing O2 sensor.
History of Oxygen Sensors
The O2 sensor was developed in the late 1960s by Dr. Gunter Bauman at the Robert Bosch GmbH Company, a global manufacturer of auto parts and components.
The first O2 sensor was installed in the Volvo 240 in 1976.
In 1980, the state of California, in the United States, began passing laws that required O2 sensors on vehicles.
Federal regulation followed in 1981 requiring O2 sensors or vehicles and light trucks.
With ODB-II regulations, vehicles with model years 1996 and later have one to four O2 sensors installed.
What is an oxygen sensor?
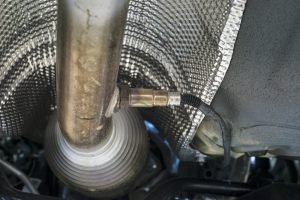
An O2 sensor is an electronic device that you’ll find located in your vehicle’s exhaust manifold.
What does the O2 sensor do in a vehicle?
The O2 sensor helps to measure the air-fuel mixture in your vehicle. It works by measuring the amount of oxygen in your exhaust and sends the information to the computer control unit or ECM.
Why do I need to monitor my vehicle’s oxygen level?
Monitoring O2 levels is important because too much oxygen in the exhaust can lead to poor performance and cause engine problems. While not enough oxygen can cause excessive emissions, reduced fuel economy, and lead to catalytic converter damage. In states and provinces that monitor emissions and require vehicle testing, a check engine light due to a faulty O2 sensor can cause your vehicle not to pass emissions testing and may require you to invest in costly repairs prior to re-testing.
Where are the O2 sensors located in my vehicle?
Most vehicles have one O2 sensor located in front of or near the catalytic converter and in the exhaust manifold. Many later model vehicles like the Chevrolet Tahoe, Honda Civic, Jeep Wrangler, and Toyota Land Cruiser have four sensors. Your vehicle’s engine type also determines the number and location of your O2 sensors.
Traditional V6 and V8 engines have left and right bank upstream and downstream O2 sensors
Transverse V6 and V8s have left front, right rear, downstream, and rear engine sensors.
In-line 4 and in-line 6 engines have front and rear bank upstream sensors and a downstream sensor.
Transverse 4-cylinders engines have an upstream and downstream sensor.
How often should I replace the sensor in my vehicle?
Consult your owner’s manual for suggested O2 sensor service and replacement intervals. Many vehicles have a 50,000-kilometer O2 sensor life, while some vehicle makes, and models last up to 100,000 kilometers. Given the location of the O2 sensor, it is constantly exposed to extreme temperatures; carbon, soot, and other debris; and gases and chemicals that cause wear and reduce the efficiency of the sensor.
Symptoms of Failing O2 Sensor
Even if your check engine light never comes on, your car may be giving your signals that your O2 sensors are failing or going bad.
A sudden and rapid decrease in fuel economy can occur long before the engine light comes on. When the air to fuel mixture is not optimal, your car uses fuel inefficiently and burns more gasoline at the faster rate.
Too little oxygen leads to excessive emissions coming from your car’s exhaust. It’s important to make sure your vehicle is moving carbon monoxide away from the vehicle and not backing up into the passenger cabin. At the same time, you’ll want to minimize emissions going into the atmosphere, especially in areas with emissions laws and regulations.
Poor performance including rough idling, stalling, hesitation, and poor acceleration.
Testing Your O2 Sensors
With the right auto parts and equipment, you can check and replace the O2 sensors in your vehicle.
If your check engine light is on, use an ODB-II code reader to find the related engine diagnostic codes. You’ll also need the tool to reset the engine light after your repairs are complete. To test the sensor, you’ll need a 10-megaohm impedance digital voltmeter. Next, you’ll need to locate the sensors in the vehicle.
Warm the vehicle up to normal operating temperature. Run or drive it for 15 to 20 minutes.
Set the voltmeter to millivolt DC scale.
Use a jack to lift and support the vehicle if you are checking the sensor near the catalytic converter.
Check the wiring diagram in your vehicle manual for the proper sensor to meter wire connections.
Check for a normal operating range of 0.10 to 0.90 V.
If your results are outside of the normal range, you can run additional tests or proceed to replace the O2 sensors.
Replacing Your Vehicle’s O2 Sensors
Make sure you have the right tools and car parts including:
Replacement O2 sensors
O2 sensor socket
Basic hand tools
Jack and jack stand
Once you’ve located the faulty sensor, disconnect the wiring harness connector and remove the O2 sensor with a socket or wrench.
Next, compare the new sensor to the existing one to ensure proper fitting.
Now, you can install the new sensor and reconnect the harness and wiring.</li
Use the ODB-II tool to clear any engine codes and ensure that your check engine light is off.
Finally, start the vehicle and make sure the engine light is off. Test drive to make sure that fuel economy and normal performance has been restored.
You’re ready also to repeat vehicle emissions testing.
Now that you understand the basic function of vehicle oxygen sensors, you can choose the right car parts and accessories and do the required maintenance to keep your vehicle operating at peak performance.
10 Cool Car Accessories
10 Cool Car Accessories
In today’s modern world, have a car isn’t enough. It’s nearly essential to have your vehicle encased in gadgets in order to have a more suitable drive. Fortunately, there are hundreds of devices to choose from. To help you choose what car accessories to have in your vehicle, take a look at the best 10 car accessories on the market below!
1. Garmin Head-Up Display
The Garmin Head-Up Display is one of the most essential car accessories and it is available on the Garmin website for $150. This futuristic device displays pertinent information directly on the windshield. It projects information like turn by turn directions, speed limits, and all sorts of other important data. The information is displayed directly in the driver’s line of sight, making it much safer to view while driving. For anyone who spends a lot of time in their car, the Garmin Head-Up Display is essential.
2. Automatic Car Adapter
The second-gen Automatic Car Adapter sells for $110 on Amazon and is one of the best car parts you can get for your vehicle. This device collects data from your vehicle’s onboard computer to locate the car, create a mileage log, and more! However, one of its most useful features is being able to contact emergency services following an accident. You can also use other third-party apps with the device, such as Next, IFTTT, and Expensify.
3. Fobo Tire Plus
The Fobo Tire Plus goes for $229 on Amazon and is one of the coolest auto parts you will see this year. It can measure your tire pressure, to ensure you’re driving on car tires that are evenly filled for fuel efficiency. Fortunately, you won’t need to check your tire pressure by hand anymore and can even monitor up to 10 cars with this handy car accessory.
4. Scosche USB Charger
Currently, the Scosche USB charger sells for $15 on Amazon. If you’re looking for a USB charger that can help give your devices more juice, there’s nothing better than the Scosche USB charger. Not only does it allow you to charge two devices at the same time, but it also glows a blue hue to indicate it’s charging. There’s nothing better than the Scosche charger, which is one of the smallest, most affordable, and best car accessories.
5. Pearl RearVision Backup Camera
Next of the list of cool auto parts is the Pearl RearVision Backup Camera. It is available on Amazon for $400. Newer cars come with backup cameras pre-installed, but what about people with older cars? Driving in reverse can be frustrating and downright dangerous because of your limited line of sight. Well, with the Pearl RearVision Backup Camera, that is no longer an issue. This handy device is compact and easy to install. The camera is integrated into a frame that you place over your rear license plate. Then, through Bluetooth and Wi-Fi, you can view the live video footage on your smartphone. There are no expensive installation costs or complicated mechanics. It should be noted, however, that this device does not work with cars that are older than 1996.
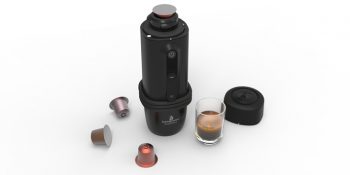
6. Handpresso
You can seriously save on coffee money when you buy the Handpresso, which currently sells for $168 on Amazon. Although the asking price may be high, remember that getting coffee at Starbucks every morning can amount to thousands of dollars a year. Plus, what’s better than being able to make and drink coffee from the comfort of your car? Fortunately, the device works with regular grounds or pods. All you have to do is plug it into the cigarette lighter in your car and presto, you have coffee! There’s nothing better than car accessories that give you coffee.
7. Park-Zone PZ-1600
The Park-Zone PZ-1600 currently sells on Amazon for $22 and is one of the best car accessories you can get for your car and garage. Simply put, this device lets you know once you’ve driven up enough in your garage via a signal light. This helps reduce the chance of ruining your bumper from rubbing up against either end of the garage.
8. High Road Car Seat Organizer
The High Road Car Seat Organizer is currently available on Amazon for $20. This is a great car accessory for families that store a lot in their car but don’t have a lot of surface area. Now, with the High Road Car Seat Organizer, you can store all your belongings in a mesh and polyester organizer. Plus, you can use the adjustable headrest trap to use on any seat with a back.
9. Bestek Jump Starter
The Besktek Jump Starters currently sell for $50 on Amazon are essential to carry in your vehicle for emergencies. However, if you’re all by yourself on the road without another friendly driver to use jumper cables, they’re less than useful. However, the Bestek Jump Starters are self-powered to jump-start your vehicle and even sports dual USB ports to charge your devices and comes with a flashlight as well.
10. Garmin Dash Cam 55
The Garmin Dash Cam 55 currently sells for $200 on Amazon. This is one of the handiest car parts. It is great for if you get into an accident and need to prove fault or general fun on a daily basis. This camera can be easily attached to your dashboard and records in 1440p video at 30 frames per second. It is definitely one of the best dash cams on the market today.
Simple Spark Plug Fixes to Make Your Car Run Better
Simple Spark Plug Fixes to Make Your Car Run Better
From oil and air filter changes to checking the transmission fluid, spark plug and a ton of other small details, there’s a lot that goes into maintaining your car. Even some of the smallest components can have a tremendous effect on your vehicle’s health.
Spark plugs, for example, play a vital role in the performance of an engine. When not replaced and allowed to erode, misfires and critical engine damage can occur.
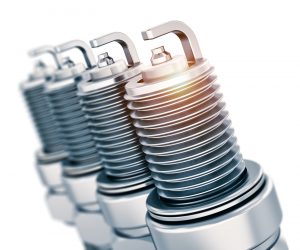
What Is a Spark Plug?
Despite their small size and minimal cost, spark plugs are extremely important. They deliver a high-voltage electrical charge produced by the ignition coil to the combustion chamber. The result is the creation of a spark that ignites a fuel and air mixture in the combustion chamber to start and keep a car running smoothly on all cylinders.
Spark Plugs – How Long Do They Last?
Spark plugs are extremely durable and made to last for thousands of miles. In fact, while older copper tip plugs are good for up to 30,000 miles, modern platinum and iridium tip plugs can last for up to 100,000 miles before needing replaced.
That being said, the longevity of spark plugs is dependent on driving conditions and engine performance. Sometimes, problems arise that must be dealt with.
Like anything else, spark plugs suffer wear and tear as they age. Their sharp edges become less sharp and more voltage is needed to connect the gaps between the ground and center electrodes.
Fortunately, spark plugs provide certain warning signs when they begin losing their effectiveness. Some of these warning signs include:
• Consistent difficulty starting the engine
• Engine misfires
• Engine surging
• Lack of acceleration
When Should Your Spark Plugs Be Replaced?
Even if your car’s engine is running fine and gives you no warning signs of eroding spark plugs, they should still be replaced according to your vehicle’s manufacturer guidelines.
You can find this information along with the type of spark plugs your vehicle has simply by checking the owner’s manual.
Three Reasons to Maintain and Replace Your Spark Plugs
1. Keep Your Car Performing Efficiently
New spark plugs will help keep your vehicle’s engine operating efficiently and at peak performance. As spark plugs wear, misfires become more and more frequent, resulting in reduced power, wasted gas, and increased emissions. Older vehicles will also begin to stall, buck, and run rough.
2. Improve Cold Starting
New spark plugs can also substantially improve your vehicle’s ability to start cold. Dirty or worn-out spark plugs require more voltage to create the spark needed to start the engine. After turning the key several times to try and start your vehicle, you may end up with a dead battery as well. Now, you have two problems instead of just one.
Maintaining your spark plugs and replacing them as needed will allow your engine to perform with less voltage and put less strain on your vehicle’s ignition system. As a result, you’ll have more amps for your starter and fuel injector, and your chances of a misfire will also decrease.
3. Minimize the Risk of Catalytic Converter Failure
New spark plugs will also decrease the risk of suffering a catalytic converter failure. A single misfire can flood your vehicle’s exhaust with enough fuel to overheat the engine and damage your catalytic converter.
The excess unburned fuel in your exhaust will increase your converter’s operating temperature and can result in a converter substrate meltdown. In turn, this can create an exhaust blockage and choke your vehicle’s engine. Although your vehicle may run, it will suffer from a lack of power and decimate your fuel efficiency.
Since a new catalytic converter can cost upwards of $700 or more, it’s much pricier than replacing a set of plugs.
Spark Plugs are an Inexpensive Solution
Compared to other engine components, spark plugs are an inexpensive fix. In fact, copper plugs sell for as little as $3. Meanwhile, newer platinum tipped plugs sell for $10-$20 apiece.
It’s worth noting, however, that these prices are for the plugs alone and don’t include installation costs. Since the process of replacing plugs varies depending on the vehicle and mechanic, get an estimate form your mechanic before getting the work done.
If you’re mechanically inclined, however, you may be able to perform the work yourself and save even more money. Nonetheless, even if you bring your vehicle to the shop for a tune-up, it will be much less expensive than a catalytic converter replacement.
Damaged Spark Plug Wires – An Easy Fix
Sometimes, a vehicle’s spark plugs are fine, but its wires need repaired. If this is the case, you can count your lucky stars as this is a cheap and relatively easy fix that can be performed in a few quick steps.
• Step 1 – Remove the Clip
Using needle-nose pliers, grip the metal clip extending from the plug and remove it.
• Step 2 – Strip the Rubber From the End of the Wire
Remove the opposite end of the spark plug wire to free it from the distributor. Then, press the wire through the boot in order to bring it out the other end. When the wire is through the boot, strip the rubber using wire cutters. Leave an inch or so of the inner wire and conductive material exposed.
• Step 3 – Place the Clip on the Wire
With the conductive material bent back along the rubber wire, slide the metal piece overtop of the conductive material so the conductive material back while gripping the wire. Then, squeeze it closed.
Next, slide the piece of metal attached to the spark plug wire through the boot. It should sit about an inch down.
Lastly, spray WD40 on the boot, place the boot on the plug and press down until the plug clicks into place. If you don’t hear a clicking sound, the metal clip isn’t connected to the plug.
That’s all there is to it. The spark plug wire should now work just like it did before.
Bottom Line
When it comes to spark plugs and engine maintenance, it pays to spend a little now to avoid more expensive problems down the road. Refer to your owner’s manual for timely spark plug changes and keep your car or truck performing like new.
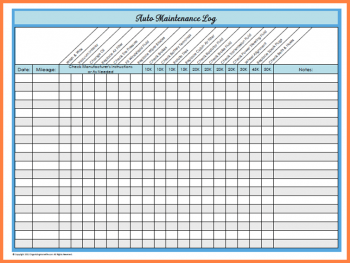
Basic Car Maintenance Schedule
Basic Car Maintenance Schedule
Motor vehicles are truly a modern marvel. Nearly everyone in Canada owns a vehicle –33.7 million vehicles are registered, nearly one motor vehicle for all36.8 million Canadian citizens – as getting around cold, rural, or cold and rural areas could prove deadly without a working vehicle, especially in the chilly, dreary, winter months.
Arguably the most annoying part of owning a vehicle is maintaining it. Automobile manufacturers don’t just suggest inspections, tune-ups, and top-offs for the fun of it; regular car maintenance can prevent breakdowns, improve performance, and extend the life of your automobile.
Included below is a basic car maintenance schedule. Whether your own a van, truck, SUV, car, or something else, it doesn’t matter – maintenance it.
Check These Areas At Least Every Month
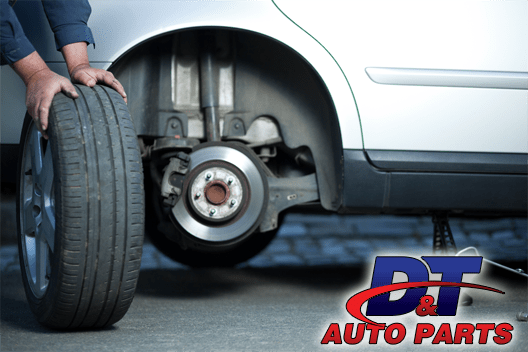
Pay Attention To Where The Rubber Meets The Road
First of all, check all four tires’ air pressure on a regular basis.
The United States has at least one advantage over Canada, and that’sthe price of auto parts.
Here in the Great White North, a set of four domestic car tires costs roughly 25 percent, on average, more than they would be down South. Going to the trouble of purchasing American products isn’t exactly convenient, and nobody wants to fork over short of 1,000 CAD for a set of tires.
However, it’s never a good idea to ride on tires that are excessively bald. Try checking remaining tread with a quarter, never with a penny. Tread length is measured in 1/32-inch denominations. Tires typically come equipped with 12/32 inches of tread; once it reaches 4/32 inches in length, a change is warranted.
If you’re really trying to stretch your money, you can semi-safely ride your tread down to 2/32 inches. However, if you can possibly afford it, replace the tread at 4/32 inches, never less.
Test this by sticking a quarter, caribou’s head facing downwards, into the tread. If you can see its antlers, it’s time for a new tire. In the following video, some silly American is using the wrong coin. Somebody should comment and tell him the Canadian Dollar’s worth a bit more – any takers?
Don’t Forget The Lights
Preferably more than once a month, check all the exterior lights your vehicle houses. Any bulbs not working, or dimmed? Try wiggling them first.
No dice? You should replace malfunctioning bulbs immediately.
Automotive lightbulbs are typically one of the cheapest car parts available, fortunately for you. Consider storing a replacement for each particular type of bulb somewhere in your vehicle, as failing to have your vehicle properly illuminated could get you pulled over by the coppers.
Paying Attention To The Check Engine Light Can’t Hurt
Although the dreaded check engine light can turn on for the silliest reasons, getting your engine’s codes checked at an auto parts dealer as soon as it pops up is an effective means of preventing serious problems in the future.
Let’s Slow It Down – Only Mind These Every Three Months
Identify Any Battery Corrosion
Pop your hood. See any green, white, grey, or blue gunk around your battery’s terminals? This corrosion can cause battery problems, even though it could be fully charged.
An easy, effective way to knock corrosion off of battery terminals is by using an acidic drink. Most people use Coca-Cola, Pepsi, RC, or another similar drink. Diet versions work fine.
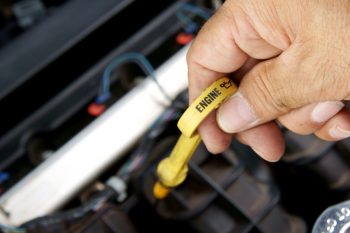
It’s Oil Change Time
Unless you don’t drive your vehicle in question very often, oil changes should come every three months, given you’ve used your automobile for at least 5,000 kilometers during that time frame.
Taking the automobile for oil changes to reliable mechanics or, better yet if you’re on a budget, franchised chains of vehicle tune-up servicers.
Keep Tabs On Your Belts
Modern vehicles typically have a handful of belts, each of which perform specific duties. The timing and serpentine belts are the two most important on any vehicle you’ll ever drive.
After locating each belt – don’t forget to shut your vehicle off beforehand – make sure there are no cracks, wear, tear, or stripping on either piece of rubber. It’s also time to replace either one if it squeaks, smokes, squeals, or otherwise makes noises.
Belts typically aren’t expensive, and often don’t have to be replaced more frequently than every 60,000 kilometers.
Twice-Yearly Inspection Time
Check All Fluids
Since you’re probably changing your motor oil more frequently than once every six months, inspecting your vehicle’s dipstick isn’t necessary at this point. However, keep an eye on the following fluids:
Power steering fluid – If any debris is present, flush and replace. Make sure it’s always topped off. Be careful to not knock dust, dirt, or debris into the reservoir when topping up or inspecting.
Transmission fluid – Without transmission fluid, your vehicle couldn’t shift gears. Locate the only other dipstick under the hood. It should be smaller than engine’s oil stick, and should be replaced if it smells burnt or is low. Otherwise? Only change every 100,000 kilometers, minimum.
Brake fluid – Really only necessary if your brakes aren’t stopping firmly. However, it’s necessary for safe driving.
See How Dirty Your Air Filters Are
Your vehicle’s two filters keep fine particles where they aren’t supposed to be – but only one’s truly important.
Air filters aren’t as cheap as most lightbulbs, though they’re one of the cheapest car parts that is integral to regular vehicular function. Never skimp on the engine air filter; changing the cabin air filter comes at your discretion, as long as you’re not sneezing every time you turn the air on.
Once Per Annum – Get To Checking Everything Else
Antifreeze levels are especially important to maintain, living in Canada.
Pay special attention to brakes, battery cables, hoses, and the battery itself. All done? Get back on the road – class has ended.
Also keep in mind that keeping your car safe is important and one way to avoid buying a new car.
Tackling Your First Brake Job – DIY Vs. Garage Repairs
Whats that Noise?!
Hearing Sounds under your car, it might be time for a new brake job! It starts in the usual way, what’s that sound coming from the car every time I hit the brakes? If you are hearing a nasty screech when you press the brakes in your car or truck? Does it sound like metal scrapping across a chalkboard every time you are trying to slow down? Well, it may be time to change your brakes and sometime even your entire brake system if it is an older vehicle.
Here’s the How To…
How Does A Brake System Work?
A car’s brake system is one of the most important components in your driving safety, as it’s the only thing keeping you from crashing into that bus full of school kids on your last minute run to the sporting store. It’s a fairly simple hydraulic system that allows the force applied at the pedal to be translated to clamping force at the wheel.
Here’s a video explanation…
How Do I Know If I Need To Change My Brakes?
Top 4 Signs
Reduced responsiveness or fading. If your brakes are not as responsive as they should be or if the pedal “sinks” toward the floor, this could be an indication of a leak in the braking system. It could be an air leak (in the brake hose) or a brake fluid leak. One telltale sign of a brake fluid leak is the presence of a small puddle of fluid when the car is parked. Brake fluid looks similar to fresh motor oil, but with a less “slimy” texture.
Pulling. If your vehicle “pulls” to one side while braking, it may be a sign that the brake linings are wearing unevenly or that there is foreign matter in the brake fluid. Your vehicle may need a brake adjustment or to have the fluid drained and replaced.
Grinding or growling. This loud metallic sound means that you have worn down the pads completely, most likely beyond replacement. The grinding or growling noise is caused by the two pieces of metal (the disc and the caliper) rubbing together. This can “score,” or scratch your rotors, creating an uneven surface. If this happens, do not be surprised if your mechanic tells you that the rotors need to be “turned” (a process that evens out the rotor surface), or even replaced.
Vibration. A vibration or pulsating brake pedal is often a symptom of warped rotors (but can also indicate that your vehicle is out of alignment). The vibration can feel similar to the feedback in the brake pedal during a panic stop in a vehicle equipped with anti-lock brakes.
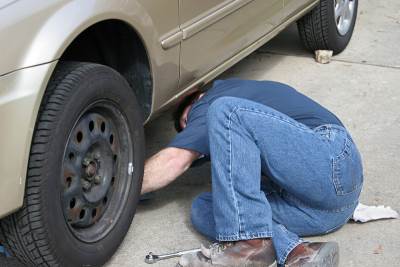
Attempting to Do the Repair Yourself Vs. Hiring a Garage
Keeping your car in running order requires some do-it-yourself tasks and maintenance that might seem like regular upkeep, but knowing when to have a qualified auto repair mechanic look at your car can save thousands of dollars later, and sometimes even people’s lives. If you’ve ignored potential do-it-yourself problems by not using the proper tools of technology available to professional garages.
Now the safety of others and your family is something to think about, but some DIY’ers are not even around to tell their story. Safety is a big factor in DIY car repairs, and is better left to the professional mechanic’s shop to worry about, unless you have had some proper vechicle repair training. Blocking up the wheels while trying to work under the car is an invitation to disaster; many people have been crushed to death because the car slipped and fell on them while they were on the ground, working underneath an unstable homemade hoist.
Don’t get us wrong if you feel up to the brake job repair here is a good walk-through, and know that you have the confidence and skill set to do car repairs, you can source all of your parts directly online from our parts catalog. Find all the Brake Pads & Routers you would need to do any repair for any make or model of vehicle by clicking the link.
If you are going to bring in the car to a professional garage, do some research… ask around and check both online reviews and social media profiles for some auto repair shops that you feel are reputable and have a great track record for customer satisfaction.
Ultimatley you are going to want the same results no matter if you do the brake job yourself or hire a garage to do the repair and that is ensure the safety of your car and family for the long haul. Depending on the complexity of the job too, as most DIYer’s are comfortable changing some brake pads, but doing a complete brake lines replacement might not be something that they are quite comfortable with yet.
Conclusion:
DT Auto and CARQUEST have been helping both Garages and Do-it-Yourselfer’s get the best Auto Parts Online and ensure both customer satisfaction as well quality parts with warranties, so you know your job is done the first time you finish it.
Find out What Type of Auto Fluid Leak is on the Ground.
Nobody likes walking out in the morning and right before you leave for work you find a large puddle under you car in the driveway or worse in the middle of your garage floor, what type of Auto Fluid Leak is it? Why did this happen to me? and so on…..
Not the best way to start your day, but …
No Worries my friend, after reading through this article you will have the confidence of being in the know. You now, will have the ability to identiy and know-how to treat the stain.
… lets get started.
Gas
Gas is probably the easiest liquid to identify because of its strong smell. If you have a large puddle under your car and it smells like gas, then you probably have a gas leak. Easy Right?! Fortunately, a gas leak doesn’t mean your vehicle is about to catch on fire. Even still, you should repair these leaks as soon as possible, especially given the price of gas these days. A leak at the rear of the vehicle indicates a hole in the tank while gas at the front usually means a break some where in the fuel line.
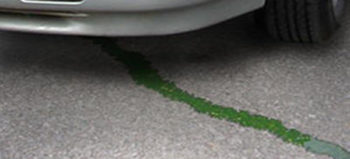
Antifreeze Fluid
Antifreeze or coolant leaks are generally easy to spot because of their light green color. Coolant liquid will feel sticky to the touch and sometimes comes in pink or bright orange varieties. These leaks are very common and do not pose an immediate threat to the engine. They should, however, be fixed in a timely manner to avoid overheating, especially during hot months.
Transmission Fluid
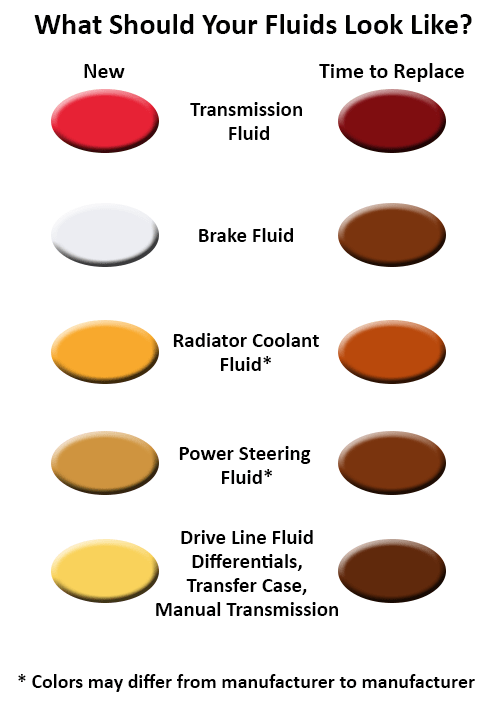
Transmission fluid generally has a red or brown color and is usually thick and slick like oil. If you discover a red or brownish colored leak, your power steering or transmission system has a breach. You probably have a hole in a line or a transmission seal that needs to be repaired. A transmission leak typically occurs near the front of the car or in the engine bay.
Quick Tip on Colour…
Sometimes, the colour of the transmission fluid may vary slightly so we added this chart to help you identify the leak, if you are unsure if the fluid is in fact a transmission fluid leak, you can leave a piece of paper under the car to see what colour shows up…
Try this out…
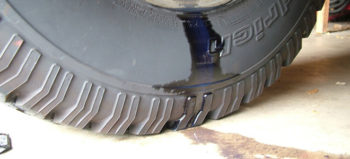
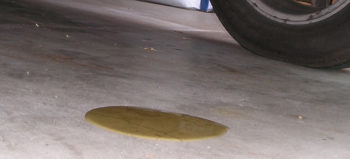
Brake Fluid
Brake fluid is usually dark yellow to brown in appearance and has an oily texture. If you suspect your car is leaking brake fluid, then you will need to get it towed immediately. Driving with leaky brake lines is a recipe for disaster and can lead to serious injury. Luckily, brake leaks are not that common and are usually located near the wheels or underneath the brake pedal.
Oil
An oil leak is another popular fluid discharge found in vehicles. Oil leaks are very serious and should be fixed immediately to prevent engine problems. The color of the oil may vary depending on its age: newer oil appears yellow while older oil is dark brown or sometimes black. If you are unsure if its oil, check the smell. Oil should not give off an odor, while gear lubricants do smell bad.
Power Steering Fluid
Power steering plays an important role in the handling of your vehicle. If you notice that turning has become more difficult, then you might have a power steering fluid leak. This fluid is usually a brownish-red, though it can appear darker when old. The key to identifying this leak is a change in the steering and location of the leak.
How to Clean all sorts of Stains from your Driveway
A Note on Changing Auto Fluids.
Be sure to keep up with regular mantainace, check all fluids often and don’t ignore any trouble lights in your vehicle’s dashboard. Have a look at this quick guide for reference.
Fixing the Leak
The first step in fixing a leak is finding its origin. Start from the puddle and draw a straight line up to the nearest engine component. This should give you a general idea of where the leak is coming from. To find the exact location, wipe the area clean with a rag until it is completely dry. Then, spray a coat of foot powder on the area and wait for the fluid to start leaking. You may need to start your car for a short period to initiate the leak. Once you find the breach, replace the line or part and repeat the process until the leak goes away.
Virtual Vehicle – Auto Repair Animations
Engage your Students with Technically Accurate –
Auto Repair Animations
CARQUEST Technical Institute is happy to provide Virtual Vehicle access to any Not for Profit vocational education program at no cost. Virtual Vehicle contains over 300 animations that accurately depict normal and failure mode automotive system operation. By completing a simple enrollment process, Virtual Vehicle will be available to all students and staff on campus from any internet enabled computer.
Why Use Virtual Vehicle?
Today’s vehicle service customers are sophisticated consumers who demand clear and concise information when spending money on their vehicle servicing and repairs. They will not approve repair recommendations they do not understand or that they don’t believe to be genuine.
Service advisors can find the task of explaining technically complex vehicle repairs very difficult, especially when the customer has left the service location and has to be contacted by telephone. With Virtual Vehicle a repair shop can send videos explaining the exact repair to the customers, presented to them electronically in the way of an animated video.
Features and benefits include:
Ability to demonstrate failure modes in the classroom
Email or text videos to students to view for assignment
Integrate with your current courseware for additional context and understanding
Unlimited use of content that is constantly up to date
To register visit virtualvehiclemd.com. Select Access the Site and Create an Account
Follow These Steps to Enroll Today!
1. Visit virtualvehiclemd.com
2. Select Access the Site
3. Select Create an Account
4. Select Educational
5. Complete form and Submit
6. CTI will contact you to complete the enrollment as soon as possible
Please Note:
(while waiting for CTI to respond, please contact your IT support team and ask for the ‘public IP range’ for your campus. The CTI administrator will need this information to allow students to login without credentials from anywhere on campus.)
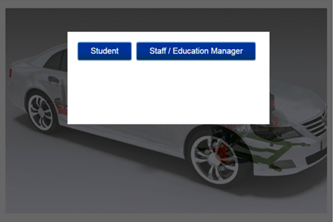
How to login on campus:
1. Visit virtualvehiclemd.com
2. The screen shown here will appear
a. Students will automatically be logged into the system
b. Staff must login to be able to access the additional tools
3. Staff has ability to email or text links to any of the animations directly to students by selecting ‘Email an Animation’
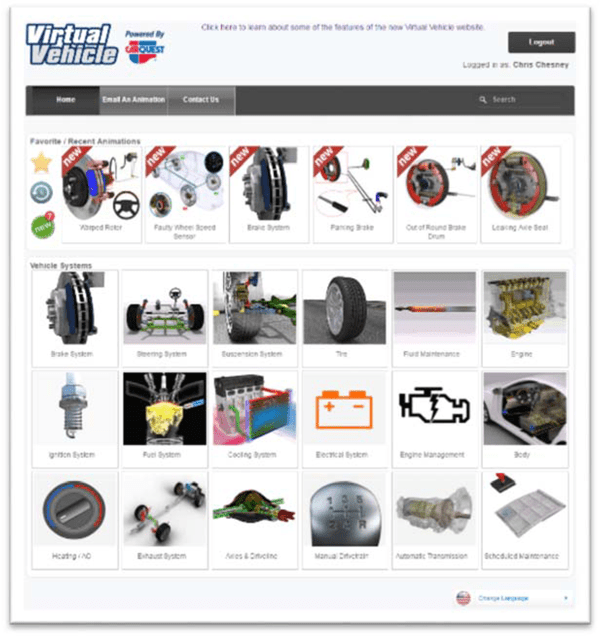
A Complete Customer Solution for Repairs
Virtual Vehicle is a cloud-based library containing hundreds of animations showing how each part of the car works and what can happen when the part fails. Our original line-drawn animations are now replaced with realistic 3D animated models, but the core value of making technical concepts simple to understand remains at the heart of what we do.
We help you bridge the understanding gap by providing your service team with a tool that gets the message across in a simple, customer-friendly way. Service advisors using Virtual Vehicle are able to sell more service and repair labor, and receive higher customer satisfaction scores.
As shops use our system to explain services to their customers, they experience:
An increase in repeat business as customers feel more confident that the services the repairer performed were truly necessary in maintaining their vehicle
More referrals as they tell their friends and family what a great experience they had at the repairers workshop
Higher sales as customers agree to more work being done, because for the first time ever they really understand what’s involved and why it is needed.
Virtual Vehicle can be accessed using any web browser or via our iPad app. Your service team can e-mail or text customers a link to an animated video if they are not in the shop, and follow it up with a phone call to answer any follow up questions and close the sale.
Want to Take All This Information with you, to Show Your Staff?
You Can download the complete PDF by clicking the button…